![Keurig K-Express Essentials troubleshooting [Expert guide]](https://askrepairbuddy.com/wp-content/uploads/2024/02/Keurig-K-Express-Essentials-troubleshooting-Expert-guide.jpg)
In this Keurig K-Express Essentials troubleshooting guide, I’ll tell you how you can fix various problems your coffeemaker might experience.
I will try to be as simple (yet comprehensive) as possible such that you can fix your coffeemaker even with no special skills.
Keurig K-Express Essentials troubleshooting guide – how to fix various Keurig coffeemaker problems
Keurig K-Express Essentials is not turning on
If your K-Express coffee maker won’t turn on, begin by making sure that you have pressed the power button.
Next, check if the circuit breaker to the coffeemaker line has flipped. Of course, if it has, you should reset it.
Finally, make sure that you have plugged the coffee maker into its own 120v AC power outlet.
If it still won’t turn on, there’s a possibility the outlet is faulty. But, to be sure, test if it has a voltage of around 120v AC.
If the voltage is not within this range, plug the coffeemaker into another (good) outlet and get an electrician to fix the faulty one.
Keurig K-Express Essentials not pumping water
Since the water reservoir might not be sitting properly on the base, start by lifting it and replacing it.
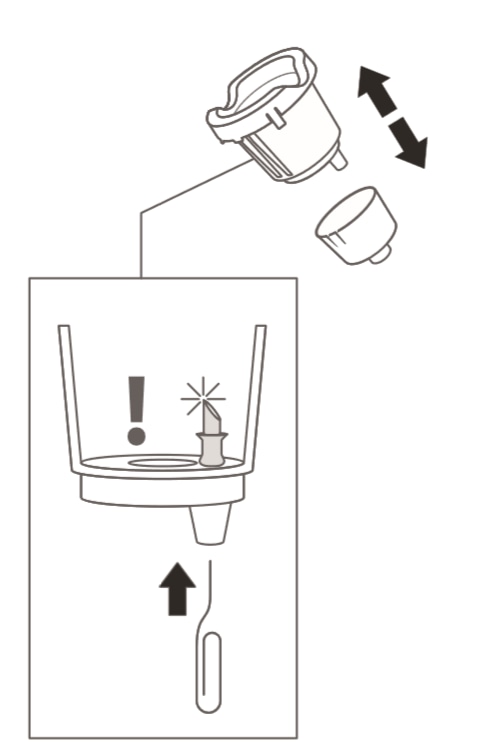
Next, use a straightened paper clip to dislodge any coffee grounds that might be caught in the exit needle.
To do so, take out the pod holder assembly and detach the funnel.
You should now see the exit needle on the inside bottom of the K-Cup® pod holder.
Now, loosen any coffee grounds that might be caught in there by inserting the paper clip into the exit needle:
Once done, proceed to use the paper clip to dislodge any clogs that might be caught in the entrance needle.
To do so, lift your coffee maker’s handle to locate the entrance needle on the lid’s underside:
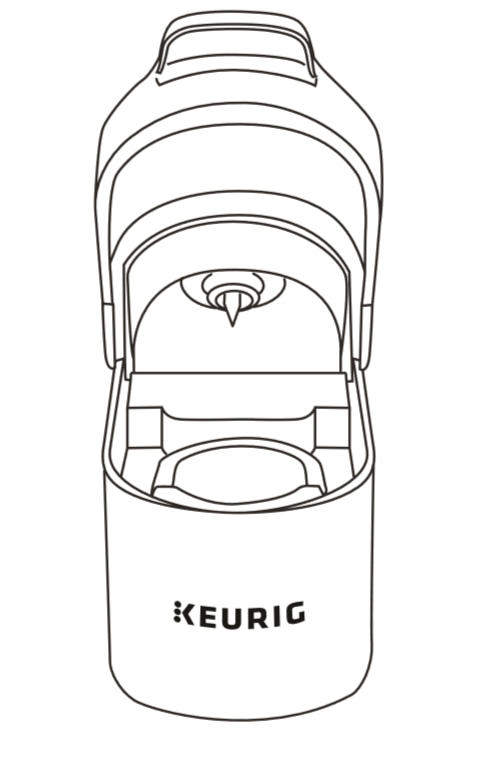
While holding the handle in the upward position, carefully insert the paper clip into all the holes and gently move it around to loosen any stuck coffee grounds.
Once done cleaning the needles, run two cleaning brews to remove any ground residues.
Pro tip: Do not insert any pod into the K-Cup® holder when running these brew cycles.
Another thing: Frequently cleaning the needles will also fix your coffeemaker if it brews coffee with coffee grounds in it.
The next likely culprits for your Keurig not pumping are the reservoir filter and check valve (found at the base of the reservoir).
These parts might be clogged by mineral buildup or air bubbles which will in turn prevent water from flowing into the brewing chamber.
To clean these parts, use a turkey baster to blow some water through the filter. This will remove any airlocks and calcium deposits that might be caught in there.
Finally, descale your Keurig using the steps below:
How to descale Keurig K-Express Essentials coffee maker
You will know that it’s time to descale your K-Express Essentials coffee maker when the descale light comes on.
Pro tip: When descaling, do not use a paper cup. Also, ensure that the K-Cup® pod holder does not have a beverage pod.
One more thing: This whole descaling procedure will take around 20 minutes to complete.
- Start with the coffee maker plugged in and powered off.
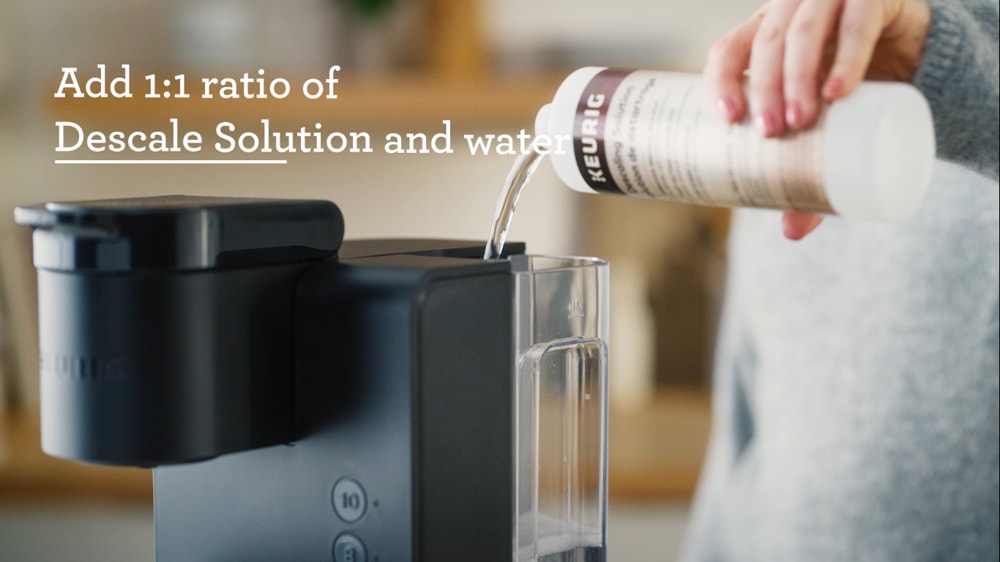
- Empty the water reservoir and pour all the Keurig® Descaling Solution into the reservoir.
- Fill the empty bottle with water and pour it all into the water reservoir:
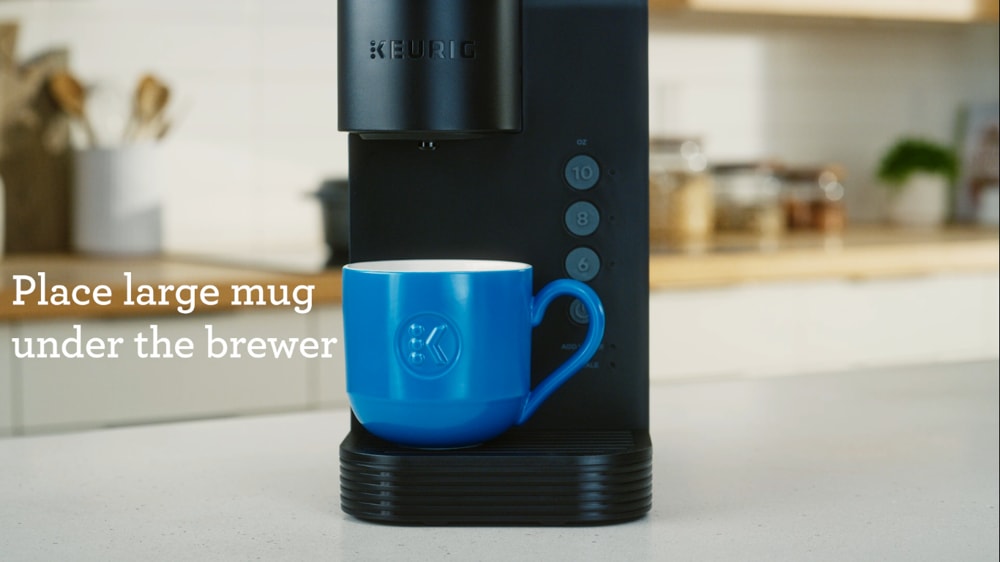
- Place a large ceramic mug on the drip tray (at least 10 oz):
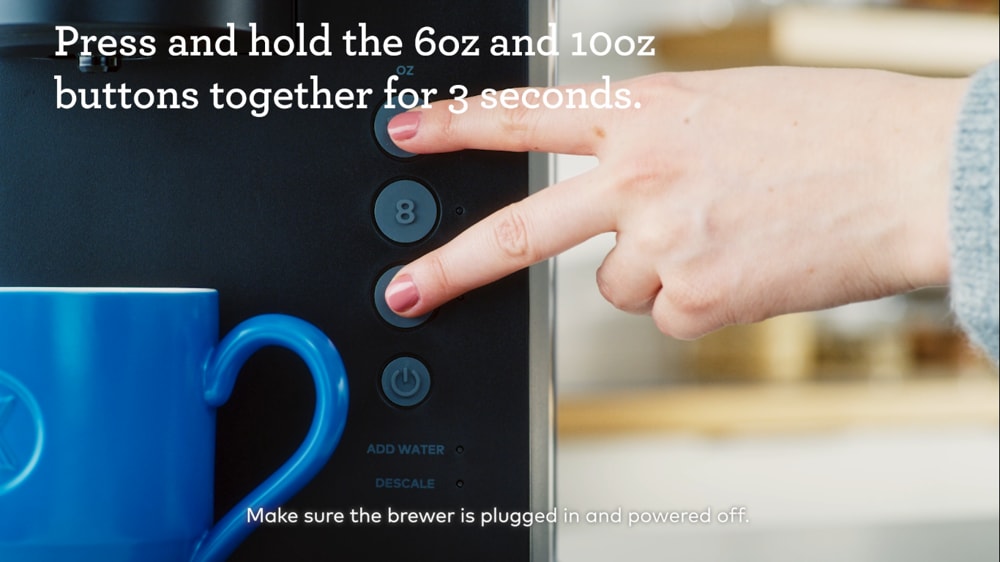
- Now, to activate descale mode, press and hold the 6 oz and 10 oz buttons together for three seconds:
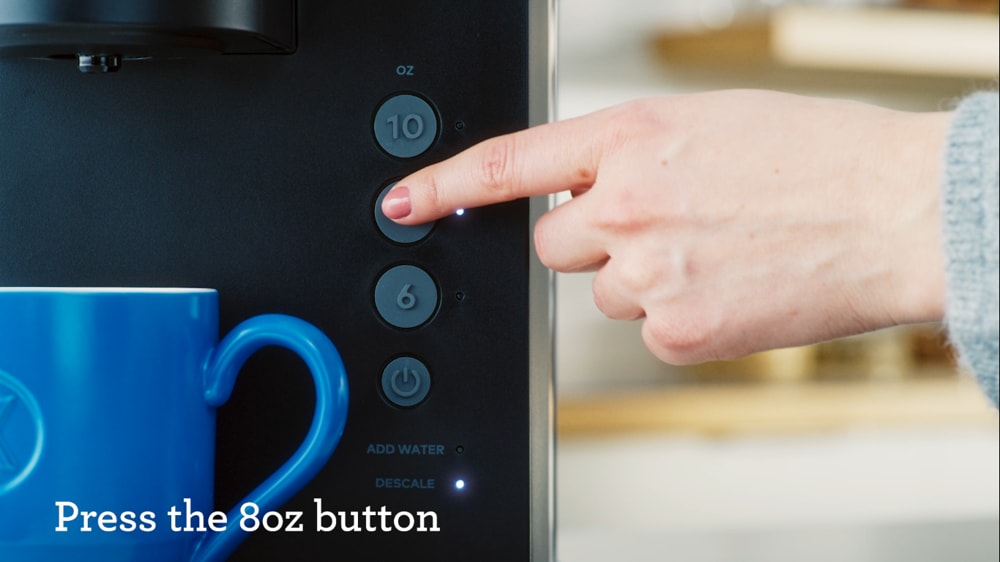
When it starts flashing, press the 8 oz button to begin the descaling process:
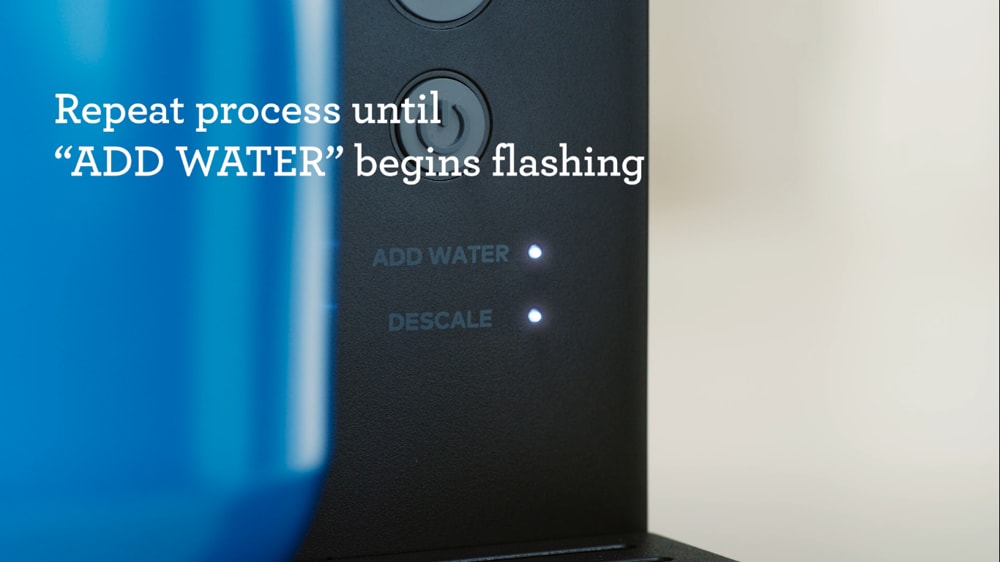
- Once the brew is completed, pour the contents of the mug and replace it under the brewer. Continue to brew 8 oz until the ADD WATER indicator light begins flashing:
- Empty the water reservoir and refill it with fresh water to the MAX fill line.
The coffeemaker will start flashing – press the 8 oz button to start the rinsing process.
- Once it finishes brewing, discard the contents of the mug into a sink and replace the mug under the brewer. Now press the 8 oz button and let the unit continue rinsing.
Repeat this step until all the lights turn off. This indicates that the descale process is over and the machine is ready for use.
Keurig K-Express Essentials not brewing (Keurig K-Express Essentials not working)
Start by making sure that the water level is at the minimum line.
If it’s not, add some more water to the reservoir till it reaches the minimum level.
Once you have added water to this level, you can now press your preferred size button for brewing to begin.
However, if water level is not the problem, I recommend you refer to the troubleshooting steps above (Keurig K-Express Essentials not pumping water) since it’s likely that water is not flowing from the water reservoir and into the brewing chamber.
Keurig K-Express Essentials coffee maker brewing a partial cup
To fix your Keurig K-Express coffee maker if it’s only brewing half a cup, start by powering it off.
Next, press and hold the 10 oz button for 5 seconds.
Once the water starts dispensing, release the button, let the water purge, and then discard the content into a sink.
Once done, refill the reservoir and press the power button to restart your coffee maker.
Other than that, it’s possible that there are mineral buildups or coffee grounds that are partially blocking the water flow to the brewing chamber.
Now, to fix this, I recommend you follow the steps we have just seen above (Keurig K-Express Essentials coffee maker not pumping water) since they are similar.
Keurig K-Express Essentials not blinking
Start by making sure that your coffee maker is getting power – refer to the troubleshooting steps above (Keurig K-Express Essentials is not turning on).
Next, make sure you have pressed the power button.
If the problem persists and your Keurig is brand-new, high chances are that the rubber button/sensor (in the back right of the K-Cup® compartment) is a little stiff.
To fix this problem, start by removing and replacing this button.
Next, press and release it to loosen it a little bit as here:
Once it springs back, your Keurig will start blinking and working like it should.
Final words on Keurig K-Express Essentials troubleshooting
As we conclude, let me mention that it’s advisable to descale your Keurig at least once every three months.
This will not only keep your coffee maker running but it will also ensure the machine is brewing great-tasting coffee.
ALSO READ